Set Up AI Translation in 5 Minutes
Configure a provider, add your API key, and translate your first key — no cloud account required beyond the AI provider itself.
StringLane supports eight AI providers through a bring-your-own-key (BYOK) model. Your key is stored in the OS keychain — never written to disk or project files. You configure it once per provider and it works across all your projects.
Supported providers
| Provider | Key required | Notes |
|---|---|---|
| OpenAI | Yes | GPT-4o and later recommended |
| Anthropic | Yes | Claude Sonnet or Haiku |
| Google Gemini | Yes | gemini-1.5-flash is fast and cheap |
| Groq | Yes | Llama 3 models, very fast |
| Mistral | Yes | Mistral Large or Small |
| DeepSeek | Yes | Cost-effective option |
| xAI (Grok) | Yes | |
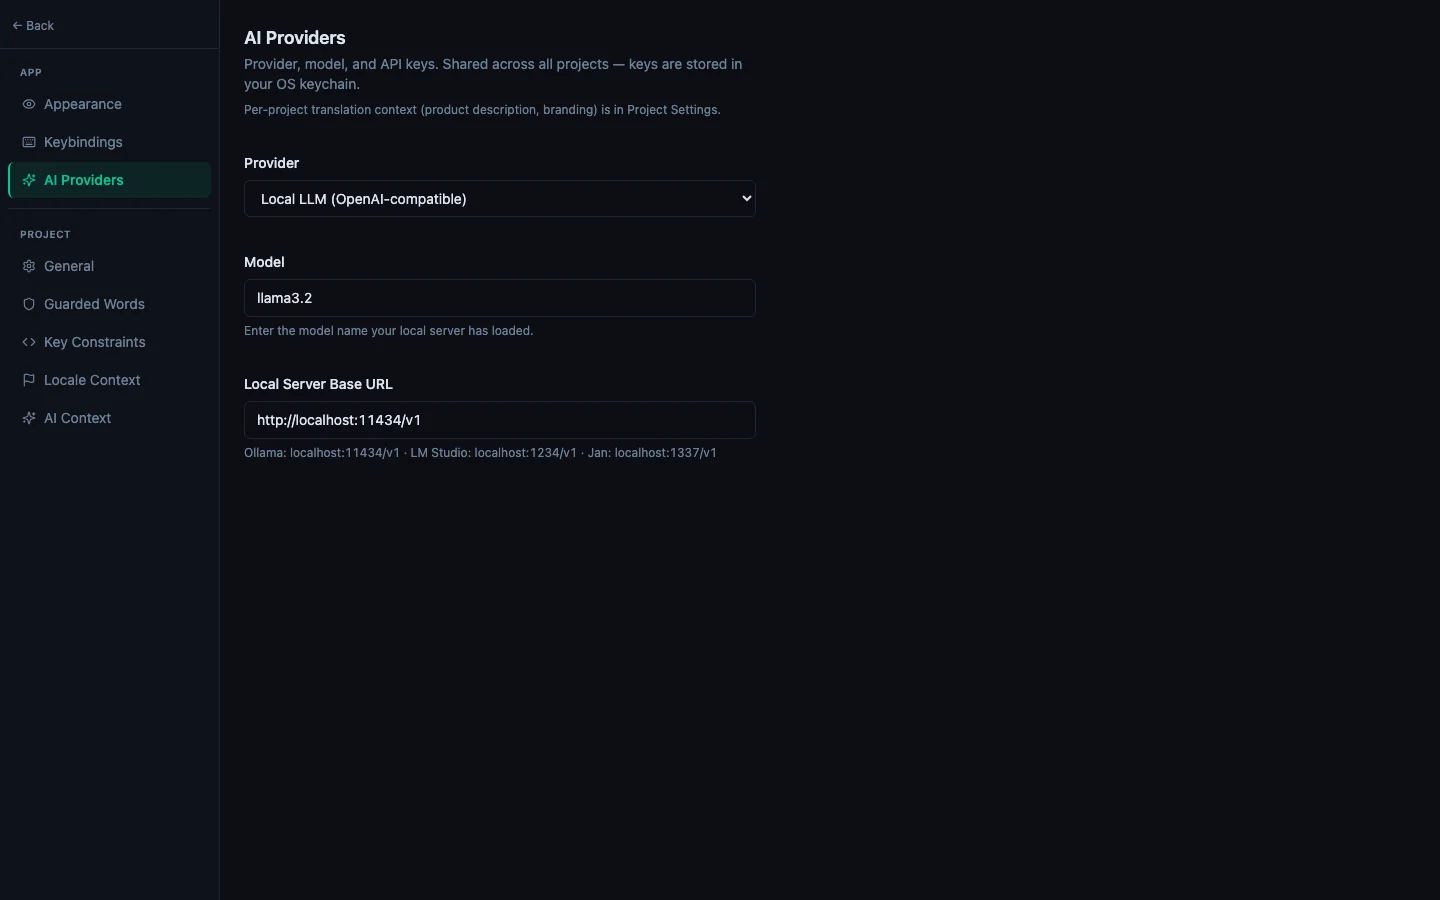
| Local LLM (OpenAI-compatible) | No key | Ollama, LM Studio, Jan, llama.cpp, vLLM — anything that exposes an OpenAI-compatible API. See How to Translate with a Local LLM. |
Local LLM is the only provider that needs no API key — it runs entirely on your machine. For all others, you'll need an account and an API key from the provider's dashboard.
Step 1: Open Settings → AI
Press ⌘, to open Settings (or run "Open Settings" from the Command Palette with ⌘P). Pick the AI tab.

Step 2: Choose a provider and model
Select your provider from the dropdown. The model field updates with a suggested default. You can type any model name or pick from the list — StringLane passes the model name directly to the provider's API, so any model the provider supports works.
Recommended starting points:
- OpenAI:
gpt-4o-mini(fast, cheap, excellent quality) - Anthropic:
claude-haiku-4-5-20251001(fast) orclaude-sonnet-4-6(best quality) - Gemini:
gemini-1.5-flash - Local LLM:
llama3.2via Ollama athttp://localhost:11434/v1, or any model loaded in LM Studio / Jan
Step 3: Enter your API key
Click Set API Key next to the provider name. Paste your key and click Save. StringLane stores it in the OS keychain (Keychain on macOS, Credential Manager on Windows) under stringlane / <provider>. The key is shared across all your StringLane projects — you only do this once per provider. If you picked Local LLM, no API key is needed — set the Base URL instead and skip to Step 4.
To get a key:
- OpenAI: platform.openai.com → API Keys
- Anthropic: console.anthropic.com → API Keys
- Gemini: aistudio.google.com → Get API Key
- Other providers: their respective developer dashboards
Step 4: Add product context (recommended)
In the Context section of the AI tab, add a brief description of your app. For example:
A task management app for freelancers. Tone: friendly and direct. Audience: non-technical users.
This context is included in every translation prompt. It helps the AI produce translations that fit your product's voice, not generic machine translations.
You can also add guarded words — brand names and product terms that must never be translated (e.g. "StringLane", "ARB", "Xcode"). The AI treats these as hard constraints.
Step 5: Translate your first key
Return to the editor. Hover over any cell that shows a Missing badge (red) or a Same badge (yellow). A ✨ sparkle button appears.
Click ✨ — the cell shows a loading state for a moment, then the translation appears. StringLane auto-saves it immediately.
Step 6: Bulk translate a locale
To fill all missing translations in a locale at once, look at the locale's column header. You'll see:
- ✨ N — translate the N missing keys (leaves existing translations untouched)
- ↻ all — re-translate every key in this locale (overwrites existing values)
Click ✨ N to start. A dialog shows progress key-by-key. You can cancel at any time — translations already completed are saved and won't be lost.

Troubleshooting
"Go to Settings" prompt instead of a translation: your API key is missing or invalid. Return to Project Settings → AI and re-enter the key.
Blank translation after ✨: the model returned an unparseable response. Try the key again — transient API errors are retried automatically, but an empty response means the model returned a refusal or malformed JSON. Check your model selection.
Guarded word appears translated: add it to the guarded words list in Project Settings → AI. The constraint is enforced via the prompt — re-translating the affected key will respect it.